Inaccessible boot device mistake in Windows 10 isn’t hard to fix. Dive down listed below to check how to repair an inaccessible boot drive error. What is the reason behind this? What is the service to fix it? You find the answer to all your concerns in this article.
How To Fix Inaccessible Boot Device Error In Windows 10
In this article, you can know about inaccessible boot device here are the details below;
What do you learn about the inaccessible boot drive mistake?
As we understand that Windows loves to update itself. In some cases, it’s exciting– specifically when an enormous upgrade rolls around. However, your excitement can immediately turn to quit.
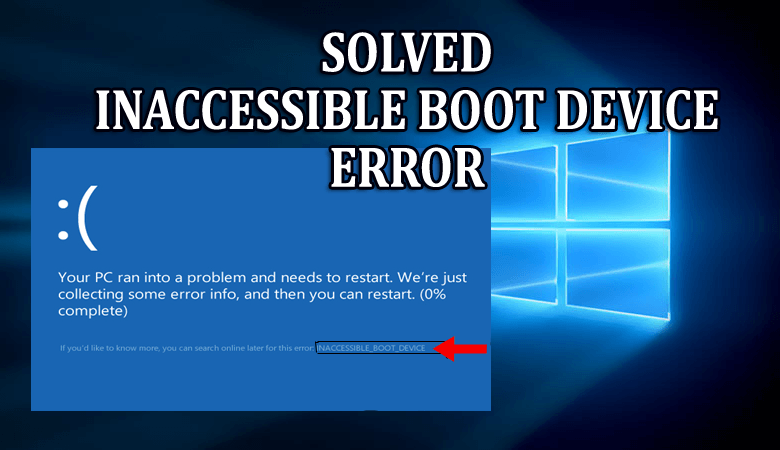
You disparately wait on Windows to reboot the upgrade, and then you see a “blue screen of death” (BSOD) with the unattainable boot drive error message, and your PC reboots. In other words, the message indicates Windows losses its access to the PC partition during the start-up procedure.
Although ten thousand users saw the code due to a 2017 upgrade; nevertheless, the boot device error has great deals of possible factors. It includes overclocked CPUs or BIOS updates. Some users suggest that the concern appears to be more normal in PCs executing an SSD.
Come let’s take a look at how to repair inaccessible boot device error in Windows 10. Sadly, you most likely won’t need to attempt several fixes.
Erase Recently-Installed Packages
If you believe that an upgrade triggered an issue, you want to resolve your presently set up packages and remove them one by one. Luckily, you will remove the update that’s triggering the problem.
Note: The provided procedure will restart your device. Remember you save any work prior to continuing.
If you want to begin, head over to the Settings application and relocate to Update and Security > Recovery > Advanced Startup > Restart Now. After some time, a blue screen appears. Just head over to Troubleshoot > Advanced Options > Command Prompt.
Your PC will boot and restart into the Command Prompt app. When the Command Prompt is on your display screens, follow these steps:
Step 1:
Get in dir c: (expecting Windows is set up in the C drive) and hit Enter.
Step 2:
Carry Out Dism/ Image: c:\/ Get-Packages.
Step 3:
You will then view all the bundles set up on your PC. Utilize the date field to examine the recent and take down its complete name.
Step 4:
If you want to eliminate the plan, enter dism.exe/ image: c:\/ remove-package/ [bundle name] Replace [plan name] with the name you noted in the earlier step.
Step 5:
Restart your PC.
After removing the current upgrade can’t solve your concern, and you still view BSODs, repeat the whole procedure with the next recent update.
Remove “Update Pending” Packages
Certainly, Windows updates got stuck in a weird limbo, forever pending, and can’t set up. These pending updates also cause an inaccessibles boot device mistake.
If you wish to eliminate them, you’ll want to open Command Prompt in the advanced start-up options after going to Updates and Security > Recovery > Advanced Start up > Restart Now > Troubleshoot > Advanced Options > Command Prompt.
When the Command Prompt app is executing. Just carry out the following three commands. They will clean the SessionsPending pc registry key. Struck get in after each line:
reg load HKLM \ temp c: \ window’s \ system32 \ config \ software.
reg erase “HKLM \ temp \ Microsoft \ Windows \ CurrentVersion \ Component-Based Servicing \ SessionsPending”/ v Exclusive.
reg dump HKLM \ temp.
Next, you want to moves any pending updates in their own short-term file. Input dism/ image: C:\/ get-package to get updates list. Then take down any having the “Install Pending” tag.
Now you want to make a short-lived file. Input MKDIR C: \ temp \ plans and hit Enter.
At last, transfer all the pending packages into the short-term file. Input dism/ image: c:\/ remove-package/ packagename: [bundle name]/ scratchdir: c: \ temp \ bundles and struck Enter. Then change [bundle name] as required.
Update Drivers.
In case if neither of the two options we’ve discussed above manages to fix your issue. Then there are some other actions you can attempt prior to transferring to your regional PC repair shop.
Initially, try and update your drivers. Damage drivers can likewise be accountable for lots of ailments on your device. The concern is most likely to present itself while using old chauffeurs. In inaccessible boot device mistake, the concern is an IDE ATA/SATA controller chauffeur.
There are two methods to look for updates. Initially, you simply check the developer’s site. Then, head over to the Device Manager. Then expand the IDE ATA/SATA controllers sub-menu, right-click on Standard SATA AHCI Controller, and pick Update Driver.
Turn On AHCI mode in the BIOS.
Some users have actually claimed that switching on AHCI mode in your PC BIOS rapidly repairs the inaccessible boot drive error. The BIOS menu can differ considerably between developers, so there’s not a one-size-fits-all method of going over the procedure.
However, in general terms, you merely input the BIOS during boot (usually by hit Escape, Delete, or among the Function keys). Just relocate to the Advanced Options menu, discover Set AHCI Mode, and modify the value to Enabled.
Check for a Damaged Hard Drive.
Harmed files on your hard drive probably are the cause of the mistake. Hopefully, if they are the roots of the issue, it’s easy to repair.
First of all, you wish to open a Commands Prompt as an administrator. To do so, hit the Window’s key, enter cmd, right-click on the result and select Run as administrator.
Within the Command Prompt application, input chkdsk/ f/ r and struck Enter. Wait a while until the application process your inputs, then input Y and hit Enter. If you can’t boot Window’s, you can also perform this command from the recovery console after getting in chkdsk/ r C.
Other Troubleshooting Fixes.
If you’ are still not organized to resolve the inaccessible boot device error, you probably feel like it’s time to employ a professional.
Nevertheless, depending upon the technical capabilities, there are few things you can attempt.
- – Head over to your device’s chassis and check for loose cables.
- – Physically examine your motherboard, RAM, and a hard disk drive for faults and damage.
At last, you simply try to takes the nuclear alternative and reset Windows 10 back to a tidy copy. If you select this technique, you will then lose all your data, so remember you make the recovery of your information prior to starting it.
Conclusion:
Here’s all about “Inaccessibles boot device error in Windows 10”. Whatever the offered techniques you used, you can quickly repair the Inaccessible boot device mistake in Window’s 10. If you want to shares any other thing relating to the post, then let us know below. For more inquiries and concerns, let us understand in the remark area listed below!