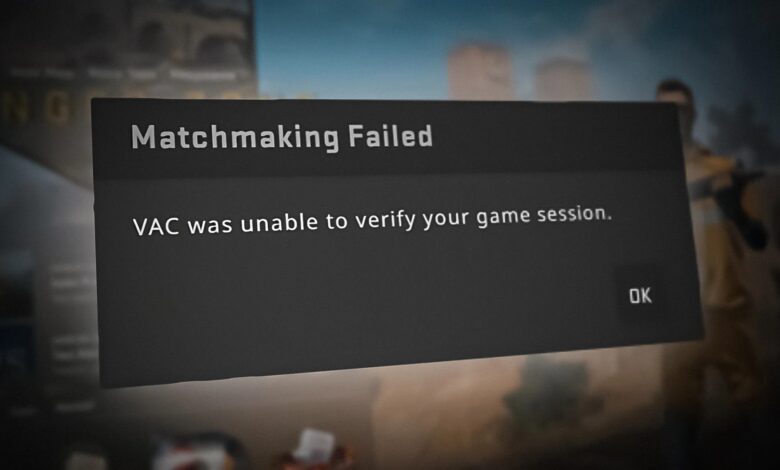
This post will explain VAC was unable to verify the game session Reddit. Counter-Strike: Global Offensives (CS: Go), developed by Valve, is a very popular Counter-Strike multiplayer first-person shooter video games. Yet, while playing the games and trying matchmaking or joining the Steam community, many user’s have complained facing, VAC was unables to verify your game session.
If you, too, are meeting the very problems and looking for a way to fix it, you are at the right place. Here we will walk you through certain fixes that will help fix the VAC game session issue.
How To Fix VAC Was Unable To Verify The Game Session Issue In Windows 10
In this article, you can know about VAC was unable to verify the game session Reddit here are the details below;
Reasons for the Valve Anti-Cheat System (VAC) authentication error
- Discrepancies detected in installation files
- VAC fails to verify the gaming session
- Corrupt configuration files
- False-positive due to which you might encounter Unable to verify the game session
Before we get into details, here’s a quick tip
Alongside facing, VAC was unable to verify the game session. If you are encountering a BSOD error or your PC’s performance is lagging, we recommend using Advanced System Optimizer. This excellent tool is designed especially for Windows, and it is efficient enough to fix all Windows-related problems. Moreover, this best PC Optimizer helps update drivers, delete junk files, free up space occupied by unwanted files, and more.
To know more about this tool, read the comprehensive review of Advanced System Optimizer.
14 Best Ways to Fix VAC Authentication Error – Windows 10
To resolve, VAC is unable to verify the game session if you have tried uninstalling and reinstalling the games, but it did not work. It is necessary to understand that doing so loads the old game files. Hence, the problem will not be fixed. Therefore, to resolve the problem, we suggest you try the following best fixes as this will take away VAC’s unable to verify the game session error. You can also check decision making apps and games.
1. Logout and login to Steam
When configuration files are modified by the operating system or file management system, a VAC error is caused. To fix this and to recreate files, logging out and is recommended. To do so, follow the steps below:
1. Launch the Steam app
2. Click your Profile name > Log out of my account
3. After logging out successfully, re-login using the credentials. In case you have forgottens the password click, Reset password.
Now try to use the game. You should not face a VAC error. However, if this doesn’t help, read further.
2. Run Steam as administrator
When an app runs without admin privileges, you can face a Steam VAC error. Hence, to fix VAC was unable to verify the game session CS: Go. We suggest running Steam as admin. To do so, follow the steps below:
1. Navigate to C:\Program Files (x86)\Steam
2. Open the folder and look for Steam.exe
3. Right-click > Properties > Compatibility tab > check the box next to, Run this program as an administrator
4. Apply > Ok
Afterward, navigate to GameOVerlayUI.exe > right-click > Properties > Compatibility tab > check the box next to, Run this program as an administrator > Apply > Ok
Once this is done, grant admin access to Steam folders. To do so, follow the steps below:
1. Again, go to C:\Program Files\Steam or C:\Program Files (x86)\Steam
2. Right-click > Properties > Security tab > Advanced button
3. This will start a new window > select the editable row > click Edit button
4. Now mark the check for options under Basic permissions, including Full Control > Apply > Ok
5. Repeat the same steps and grant permission to each file
6. Now re-launch Steam to run it with admin rights. This should solve the VAC error.
3. Reboot Steam Client
If VAC was unable to verify your games session is caused due to corrupt files, restarting the Steam client can help fix it. To do so, follow the steps below:
1. Exit Steam by clicking the Steam tab
2. Re-launch Steam
3. Click the Steam tab > Go offline from the context menu
4. Select Restart in offline mode
5. Again, click Steam tab > Go online from the context menu > Restart and go online
Once this is done, try queuing for a match, VAC was unable to verify the game session should be resolved.
4. Restart the system
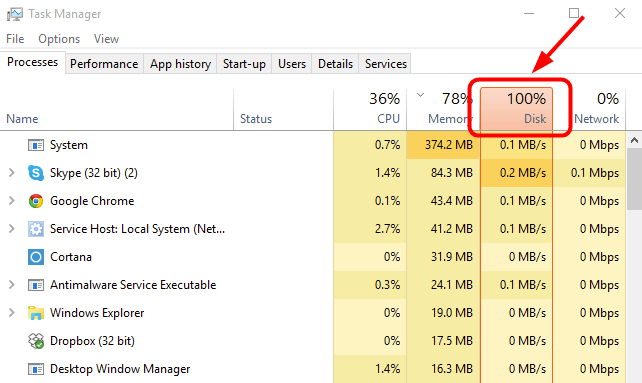
When processes and apps like disk indexing run in the background, it interferes with the game, due to which VAC fails in verifying files. To resolve it, restarting the computer is recommended. After restarting the system, try to run the game. If this doesn’t work, turn off the PC, disconnect from power and restart it. Also check Xpadder alternative windows 10 Reddit
Note: If you are using a laptop, we suggest removing the battery and then press & hold the Power button for 1 minute. We recommend removing the battery as it will help discharge all electrical condensers and ensure RAM is cleared.
This will help reset the configurations and unresponsive programs.
5. Repair Steam client and files
If Steam is corrupt or it contains a bad file, then you can face CS: Go VAC was unable to support your sports session error. To fix it, follow the steps below:
1. In the Windows search bar, standard Command Prompt
2. Select the search result > Run as administrator
3. Type the following command: “C:\Program Files (x86)\Steam\bin\SteamService.exe” /repair
4. Wait for the command to execute
5. Exit Command Prompt and restart the system
6. Now try to run the game. You should not face a VAC error
In addition to this, we suggest repairing Steam Files as this will help CS: Go VAC error go away. To do so, follow the steps below:
1. Head to C:\Program Files (x86)\Steam\SteamApps\common\Counter-Strike Global Offensive\csgo\maps\workshop. Select all the items by pressing Ctrl +A and delete them. Also check best apps for graphic artists.
2. Next, head to
C:\Program Files (x86)\Steam\SteamApps\common\Counter-Strike Global Offensive\csgo\maps\graphs\workshop select all the items and delete them
3. After doing so, launch Steam. This will download a fresh copy of all deleted files
4. Now, check if the VAC error is resolved or not. In case it doesn’t help, follow the steps below:
Press Windows + X > PowerShell (Admin)
Type following commands one after the other (Make sure you press the Enter key after each command)
start steam://flushconfig
ipconfig /release
ipconfig /renew
3. This should help. If this too doesn’t work, try disabling security features that allow VAC function. For this in elevated command prompt type: bcdedit.exe /set {current} nx OptIn and press Enter.
4. Wait for the command to execute. This should help fix things.
6. Repair game library
When integrity issues are detected within game files, you face VAC was unable to verify your game session. To fix it, follow the steps below:
1. Launch the Steam app > Library tab.
2. Right-click on Counter-Strike: Global Offensive > Properties > Local Files tab > click Verify integrity of game files.
3. Let the process finish
4. Exit Steam app and then launch Counter-Strike: Global Offensive.
5. This should help resolve the problem.
Afterward, we will need to repair the Library folders. To do so, follow the steps below:
1. Launch Steam > click Steam tab > Settings.
2. Select and click the Downloads > Steam Library Folders.
3. This command open a new pane > here, right-click on the location that has Steam content> Repair Library Folder > confirm the action.
4. Wait for the process to complete. Once done, restart the Steam client and then try to run Counter-Strike: Global Offensive.
7. End the Steam service
If there’s a problem with the Steam service that runs in the background, you might face CS: Go VAC was inadequate to verify your game gathering. To fix it, follow the steps below:
1. Press Ctrl+Shift+Esc
2. Click Processes tab > select Steam service > right-click > End Task
3. Now try to run the game. This should help fix VAC cannot verify game session problems.
8. Add game directory to whitelist
If the security program you are running scans the game in the background, it might interfere with VAC file verification, due to which you might face problems. Therefore, to solve Counter Strike Global Offensive, VAC was unable to verify your game session. We suggest adding the Steam directory to the exclusion or whitelist of the antivirus you are using. If this doesn’t help, try disabling it temporarily. Also check wireshark no interfaces found
Note: Since the method to add a file to the exclusion list differs, you will have to contact the support of the respective antivirus you are using.
9. Opt-Out of Steam Beta
If you are using Steam Beta mode, you can try opting out of it, as it will help fix the issue. To do so, follow the steps below:
1. Launch Steam > sign in > Steam tab > Settings > Account > Change Beta participation button to NONE – Opt-out of all Beta programs.
2. Save the changes.
3. Now try to run CS: Go, you should not face any problem.
10. Delete temporary files
When the temporary files stored on your system get old, then you might face VAC unable to verify game session error. To resolve this, follow the steps below:
1. Press Windows + R
2. Type ‘%temp%’ > Ok
3. Press Ctrl + A to select all items and Delete them
4. Launch Steam the problem should now be resolved
11. Verify DLL file
Verifying Steam DLL files also helps fix VAC unable to verify the game session. You can find the Steam service DLL file in the Program Files folder and the second DLL file in the Steam installation directory. Also check webroot vs avast.
Note: When these two files vary, VAC cannot verify the game session. Hence you end up facing VAC and are unable to verify the game session. To fix this, we will require to replace the second DLL file.
1. Head to C>Program Files (x86)> Steam > Bin, Steam installation directory.
2. Right-click > Steamservice.dll > copy it.
3. Again, go back to C>Program Files (x86)>Common Files> Steam and paste the copied .dll. When a prompted file already exists, pick the Replace option.
4. Now, launch the game. You should not face any problems.
12. Disable background services that you think might interfere
If you use proxy or VPN, then you might face Counter Strike Global Offensive VAC was unable to verify your game session. To fix this, you need to stop background running processes.
1. Press Windows + R > Services.msc > Ok
2. Navigate to the following services:
- VMnetDHCP
- VMUSBArbService
- VMware NAT Service
- VMwareHostd
- VMAuthdService
should
3. Right-click each of them one by one > Disable
4. Exit the Services window
5. Press Ctrl + Shift + Esc > Processes tab to locate the following processes:
- hydra.exe
- hsswd.exe
- hsscp.exe
- vmware.exe
6. Select each one by one and >End Task button.
7.cClose Task Manager and then check if the problem is solved or not.
13. Update your drivers
If the above steps have not helped, it seems the device driver running on your system is corrupt. To resolve this, we suggest updating drivers. For this, you can use the Driver Updater module offered by Advanced System Optimizer.
To use it, follow the steps below:
1. Install, launch, and run Advanced System Optimizer
2. Click Windows Optimizers > Driver Updater
3. Run the scan and update all outdated drivers
4. Reboot the system and then try to run the game. You should not face any problems.
Note: If you are using the registered version of Advanced System Optimizer, you can update all outdated drives in one go.
14. Update Windows
If nothing has worked so far, we suggest updating Windows as this will help fix all the bugs and remove vulnerabilities that might be causing VAC to be unable to verify your game session.
- Press Windows + I > Update & Security
- Windows Update > Check for updates
- Wait for the process to finish. Once done, restart the system, and you are done.
- Now try to run CS: Go. You should not face VAC error.
We hope using the tips explained above, and you can solve VAC that was unable to verify your game session. Do leave your comments, feedback, and questions in the section below.
FAQ –
Q1. What does it mean when VAC is unable to verify your game session?
When you receive VAC, it is unable to verify your game session, which means the configuration files are either corrupt or something is wrong with them. Sometimes it can be a false positive, due to which you might encounter Unable to verify the game session.
Q2. How do you verify VAC in CS: GO?
To verify CS:GO go to Steam library > right-click Counter-Strike: Global Offensive > Properties > Local Files> Verify integrity of game files.
That’s it you have now successfully verified CS: GO.
Q3. How do I fix VAC error 2021?
To fix the VAC matchmaking failed error, we suggest performing the following actions:
- Logout and login to Steam
- Run Steam as administrator
- Reboot Steam Client
- Restart the system
- Repair Steam client and files
- Repair game library
- End the Steam service
- Add game directory to whitelist
- Turn off Steam Beta
- Delete temporary files
- Verify DLL file
- Disable background services that you think might interfere
- Update your drivers
- Update Windows
Q4. How do you fix matchmaking failed in CS GO?
To fix matchmaking failed we suggest verifying Game Cache, deleting temporary files, disable Windows Firewall, Change DNS Address and follow other options explained above.