Ways To Set Up A Minecraft Server On Linux will be described in this article. You might wish to set up a Minecraft server on your Linux computer for a variety of reasons. Because your friends are coming over later in the day or because you prefer to have complete control over the game, you might wish to play local multiplayer at that time. Regardless, it’s simple to set up a Minecraft server on Linux, and we’ll show you how to do the same.
How To Set Up A Minecraft Server On Linux
In this article, you can know about Minecraft Server On Linux here are the details below;
Requirements for Setting Up a Linux Minecraft Server

The requirements for setting up a Minecraft server on Linux are as follows:
- Java version 17 or higher, and of course, the Minecraft Server Java archive (JAR).
Note: Because we’re operating the Minecraft server locally, your computer’s performance may suffer. Since closing the terminal would terminate the server, we advise minimising it right away or starting a new instance if you need to do something else.
Set up a Minecraft Server on Your Linux System
Step 1: Install Java in Your Linux Distro
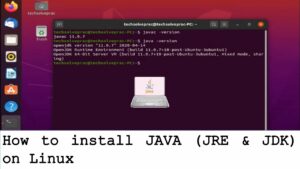
The server file and Minecraft were both created in Java. Therefore, in order to start the server, you must first install the most recent Java version. Only Java versions 17 and higher are presently supported by Minecraft. We will therefore install the most recent version of the same. To begin with, Java is a very well-liked programming language for creating programs. It’s simple to install Java on Linux using a terminal.
From its official page, you can download the most recent Java version. A few instructions must then be entered before Java can be used on your Linux machine. For the most well-known Linux distributions, including Fedora/CentOS and Ubuntu/Debian-based distributions, DEB and RPM installers are offered. However, Java may still be installed with Pacman if you’re running Arch.
Now that we hold that out of the path, let’s learn how to install Java on Linux so that it can power our Minecraft server:
- Access the Java Development Kit (JDK) accessible in.deb or.rpm packages from the official Oracle website.
Obtain Java 2 now. After downloading, double-click the file to launch the usual package installer for your distro. Java 3’s default package manager. To check if JDK is packaged and prepared for installation after installation, open the terminal and enter the following command. Also check minecraft saddle
Update-alternatives /usr/bin/java /usr/lib/jvm/jdk-20/bin/java /usr/bin/java –install 5. Once finished, use the following command to see if Java was installed correctly. The output will contain the Java version that is currently installed on your computer.
2. Download Minecraft Server Jar file

The next step is to download the Minecraft Server Java file and execute it on your Linux computer after Java is up and running. To do so, adhere to these guidelines:
- Visit the official Minecraft website and download the Minecraft Server.jar file.
Step 3: Run the Minecraft Server File (First Time)
- After that, use the cd command to change the directory into the folder containing the jar file. For instance, run the command below if you saved the jar file to your desktop:
- Running the command 3 for the Minecraft server. The next step is to copy, paste, and press enter the following instruction.
- server.jar nogui java -Xmx1024M -Xms1024M
- If you’re unsure what this command implies, we’ve broken it down below for you:
- Heap size, Xmx. One gigabyte is denoted by 1024M. Depending on the amount of players, you can modify this value.
- Initial, minimal Java heap size is Xms. Again, depending on the amount of players, this can be altered.
- With the -jar option, we inform Java that a jar file has to be run.
- Your Linux Minecraft server’s server.jar file.
nogui: Running the command without this parameter displays a GUI that shows you how much memory is being used. This is not required.
- Once you’ve reached the output, scroll all the way down to where the command asks you to accept the Eula (End User License Agreement). To do that, locate the eula.txt file in the same folder as your sever.jar file.
Search for the Eula.txt file 5. Any text editor can be used to open it and modify “eula=false” to “eula=true,” then save and close the file.
Eula false should become true. Also check Nintendo Switch Minecraft addons
Step 4: Start and use your Minecraft server

Once finished, rerun the command from the third step to start everything up. To run the Minecraft server, copy and paste the following command into the Linux Terminal:
- server.jar nogui java -Xmx1024M -Xms1024M
- Start the Minecraft Java Server 4. That’s basically it. You can now start Minecraft and connect to your new server with your buddies.
- Playing Minecraft on Linux
- You can play Minecraft with friends on your own Linux server by following these steps. Did the previous instructions help you successfully create a Minecraft server? Let us know in the remarks area below if you have any questions.