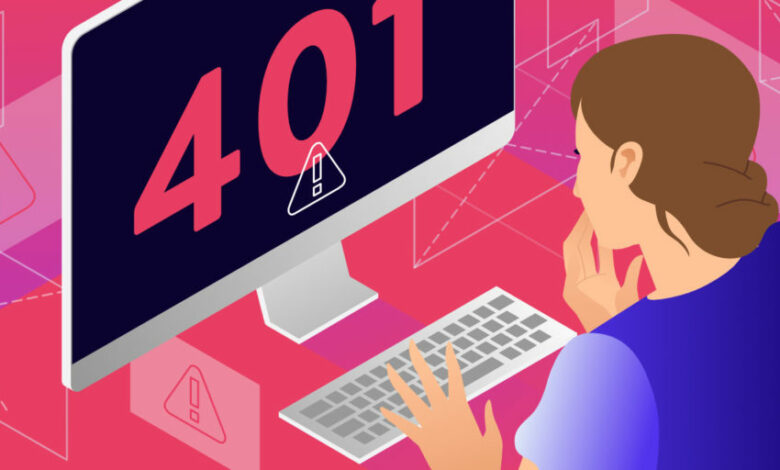
What is a 401 Error & How Do You Fix It?. Imagine you’re trying to update your website, but for some reason, you can’t access the back end. Worse yet, you can’t even get to your WordPress Login page because there’s a pesky 401 error barring the way. An HTTP error 401 means there’s a problem authenticating your browser credentials. In this article, we’ll break down what that means and what causes it. Then we’ll go over five methods you can fix the problem so that you can get back to your regular posting schedule.
What is the HTTP 401 Error and What Causes It?
At some point, you’ve probably tried to log into WordPress and accidentally submitted the wrong credentials. When that happens, you see an error page that lets you know you made a mistake, but you can still gain access by re-entering the correct username and password.
The 401 error is similar in that it involves you trying to access a website using the wrong credentials, but at a higher level. If your browser doesn’t authenticate properly with your site’s server, you wouldn’t even make it to the WordPress Login page.
A 401 Authorization Required error means you can try accessing the resource again using the correct credentials. In other words, it’s often a temporary problem, unlike an HTTP 403 error in which you’re expressly forbidden to access the page you’re hoping to reach. In some cases, a 401 error will go away on its own, giving you access to your website again. However, getting locked out of your site even briefly is inconvenient. Instead of sitting around hoping your browser will resolve the issue, you can take action to reach the back end faster.
What is a 401 Error and How Do You Fix It?
In this article, you can know about 401 Error here are the details below;
The main problem with a 401 error is that it has multiple potential causes. This makes it hard to know which one is affecting your browser. With that in mind, we’re going to discuss several possible fixes so that you can work your way through them.
1. Flush Your Domain Name System (DNS) Records
In many cases, your computer will store data about the IP addresses and URLs you access most often. That way, it can process future requests faster. Flushing your DNS involves deleting all that temporary data from your computer. That way, the next time you try to access the problematic URL, it’ll make a completely new request and re-authenticate. The process for flushing your DNS varies from one Operating System (OS) to another.
Windows will return a success message and you can try accessing your website again. Mac users will need to follow a similar process, but the command you need to enter in Terminal varies depending on which version of OSX you’re running. Users of the three most recent iterations (Sierra, High Sierra, and Mojave) can use sudo killall -HUP mDNSResponder. Also check MetaMask Alternatives
2. Clear Your Firewall and Browser Caches
Browsers can also store data so they don’t have to load websites from scratch every time you access them. This process is known as caching. In some cases, you might inadvertently be storing incorrect login information. If that’s the root of your 401 error, fixing it is simple. Most modern browsers enable you to clear your cache in a matter of minutes.
Clearing browser data in Chrome. Then you can specify which data you want the browser to delete.
Clearing cached images and files in Chrome. Try accessing your website once more. If the problem persists, the error may be due to your firewall’s cache (if you’re using one). In some cases, your firewall may not be communicating with your server, leading to authentication errors. The process for fixing this will depend on the tool you’re using. If you’re a Cloudflare user, you can access your dashboard and navigate to the Caching tab. Inside, you’ll find an option to Purge Everything, which includes your firewall’s entire cache: Purging the Cloudflare firewall. Purging your firewall’s cache won’t affect its functionality. Worst-case scenario, you might run into longer loading times on your next visit to your site, but that should fix itself after your cache is rebuilt. If you’re using a different firewall tool, you’ll want to look through its documentation and check if it enables you to clear your cache manually. For some services, it might be necessary for you to contact support instead.
3. Test for Conflicts Between Your WordPress Plugins and Theme
Compatibility issues with your WordPress plugins and theme can sometimes trigger a 401 error. Deactivating either element in order to determine the source of the conflict is simple if you have access to the dashboard.
Deactivating WordPress plugins from the dashboard. For your theme, switch to a WordPress default such as Twenty Nineteen or Twenty Twenty. You can then reactivate each plugin one by one and wait for the issue to reoccur. You should be capable to check down the problematic element. However, a 401 error may prevent you from accessing your dashboard. That means, to disable your plugins and theme, you’ll need to use File Transfer Protocol (FTP) and an FTP client such as FileZilla.
Deactivating plugins in FileZilla. Then, rename each plugin’s folder by right-clicking on it. Something simple like plugin-name _disabled will do. This will prevent WordPress from locating these folders. After disabling your plugins, access your website once more. If the 401 error is gone, it means an incompatibility between one or more elements was the root cause. You can then return to FileZilla change your plugins’ names back. Check your site between each one. When the 401 error reappears, you’ll know the most recently activated tool is the culprit. Disabling themes works similarly.
Deactivating a WordPress theme in FileZilla. A default theme will automatically be activated to replace it. Once more, test your website to see if the 401 error persists. If not, your theme may be part of the problem and you’ll need to look for alternatives. Also check Datadog Alternatives
4. Disable Password Protection for Your WordPress Directories
Tweaking your WordPress .htaccess file can enable you to implement several handy features. One of them is password-protecting your WordPress directories, which adds an extra layer of security beyond your Login page. The problem is, password protection at this level doesn’t include a recovery process for your credentials. If you forget them, you’re locked out, unless you disable the feature entirely. Disabling the credentials prompt is easy via FTP. You can either eliminate the password protection feature entirely or turn it off for the directory you want to access. For the first method, you need to locate the .htaccess file within your WordPress root directory. Right click on it & select the Edit option, which will open the file using your default text editor: Editing .htaccess via FileZilla.
Deleting this snippet entirely will disable password protection for all your directories. Additionally, every relevant directory should have a second file called .htpasswd. Deleting it will also remove password protection, but only for that specific folder. Whichever approach you decide to take, try re-accessing your site once you make the necessary changes. If that doesn’t work, the source of your 401 error may lie higher up.
5. Contact Your Hosting Provider
If everything else fails and the 401 error persists for a while without resolving itself, your best bet is to get in touch with your hosting provider. At this stage, you’ve tried everything else, which means there may be a server-related issue causing the problem. Your provider’s support team has access to better diagnostic tools, which means they can help you zero in on the cause of the issue. Tickets may take a while to process, however, which is why the smart move is to try troubleshooting the 401 error on your own first.
Conclusion
It’s not uncommon to run into errors in your day-to-day web browsing. Usually, it’s not a big deal. However, it becomes serious when the website that’s hitting you with a 401 error code is your own. Unless you manage to troubleshoot it, you may find yourself locked out for a prolonged period of time.